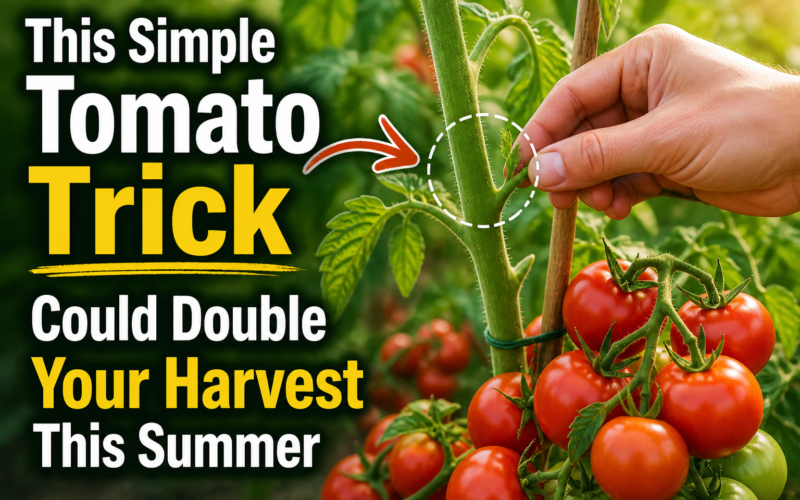
Category: Vegetable Growing

  • When to Harvest Common Garden Vegetables for Best Flavor

    The single biggest difference between a homegrown veggie and a store-bought one is timing. Picked at peak ripeness, even an average tomato beats anything from a supermarket. Here are the harvest signs for the most common backyard vegetables and a few tricks to keep flavor at its peak.

    Harvest signs by crop

    Tomatoes

    • Color is fully developed, with a slight give when pressed.
    • Twist gently — ripe tomatoes drop into your hand without yanking.
    • If frost threatens, pick green ones and ripen them indoors on a counter.

    Cucumbers

    • Pick young and slim for best flavor — large cukes turn bitter and seedy.
    • Slicing types: 6–8 inches long.
    • Pickling types: 3–5 inches long. Daily checking is normal in summer.

    Lettuce and greens

    • Cut outer leaves when 4 inches long — the center keeps growing.
    • Harvest in the morning for the crispest texture.
    • Stop harvesting once flowers form; the leaves turn bitter.

    Peppers

    • Sweet peppers can be picked green or left to ripen for sweeter flavor.
    • Hot peppers reach full heat at full color (red, yellow, or orange).

    Beans

    • Pick when pods are firm and pencil-thick — before bumps from seeds show.
    • Harvest every 2–3 days to keep plants producing.

    Root crops

    • Carrots: pull when shoulders are 1–1.5 inches across.
    • Beets: best at 2–3 inches diameter.
    • Radishes: 30 days from sowing — checking daily prevents woody roots.

    Morning harvest tips

    Vegetables are coolest, crispest, and most hydrated in the early morning. A morning harvest stores better and tastes brighter.

    • Use clean, sharp scissors or pruners.
    • Place fragile leaves in a shaded basket — never plastic in the sun.
    • Rinse and dry promptly; refrigerate within an hour for the best texture.

    Practical tips

    • Harvest more than you think — frequent picking signals more production.
    • Keep a small scale to track yield. It helps you plant smarter next year.
    • Share extras with neighbors. Goodwill is the best garden output.

    FAQ

    What if I miss the perfect window? Many crops still cook well even when oversize. Roast woody carrots; turn giant zucchini into bread.

    Can I store fresh-picked vegetables on the counter? Tomatoes yes (better flavor). Most others go in the fridge.

    Conclusion

    Watching for harvest signs is one of the most rewarding parts of gardening. Combine this guide with our beginner vegetable garden guide and you’ll have plump, flavorful produce all season long.

  • Vegetable Garden Watering Schedule by Season and Weather

    Watering looks simple, but most home gardens are either over- or under-watered. The right schedule depends on the season, the weather, and how mature your plants are. Here’s a flexible plan for getting it right without becoming obsessive.

    Watering basics

    • Most vegetables need about 1 inch of water per week, including rain.
    • Deep, less-frequent watering builds stronger roots than daily light watering.
    • Always water at the base, in the morning if possible.

    Spring

    Soil holds moisture longer in cool weather, and seedlings need gentler watering.

    • Water once or twice a week if rainfall is short.
    • Use a fine spray or watering can on new transplants for the first week.
    • Mulch after the soil warms up to lock in moisture.

    Summer

    This is when watering matters most. Heat, wind, and long days dry beds quickly.

    Heat waves

    • Water in the early morning before the sun is high.
    • Containers may need water twice a day above 90°F.
    • Shade cloth on lettuces and peppers reduces wilting.

    Mulch

    • Maintain 2 inches of mulch to cut evaporation in half.
    • Refresh after heavy storms wash mulch away.
    • Pull mulch back from stems to avoid rot.

    Fall

    Cooler nights and shorter days mean lower demand. Be careful not to overwater.

    • Reduce frequency to once a week or less.
    • Check soil 2 inches down before watering.
    • Water deeply if a frost is coming — moist soil holds heat better.

    Practical tips

    • Stick a finger 2 inches into the soil. Dry? Water. Damp? Wait.
    • Set a rain gauge to track real rainfall.
    • Drip irrigation on a timer is the single biggest upgrade for busy gardeners.
    • Group plants with similar water needs together.

    FAQ

    Is overhead sprinkling okay? Sometimes — but it wets leaves, encourages fungus, and wastes water in heat. Drip is better.

    Should I water before rain? Skip it. Just check soil after the rain stops.

    Conclusion

    Watering well is about reading the soil and the weather, not following a rigid clock. Combine this schedule with a mulch routine (see easy mulching tips) and your garden becomes more forgiving — even when life gets busy.

  • Best Vegetables to Grow in Containers on Patios and Balconies

    You do not need a yard to grow real food. With a sunny patio or balcony and a few well-chosen pots, you can harvest salads, herbs, peppers, and even tomatoes from a few square feet. Here are the easiest container vegetables and how to keep them happy.

    What makes a good container crop

    • Compact growth habit (bush or dwarf varieties).
    • Quick to maturity — under 70 days is ideal.
    • Tolerates restricted root space and frequent watering.

    Top choices

    Lettuce and salad greens

    Cool-loving, shallow-rooted, and fast. A 6-inch deep container with loose potting mix works great. Cut leaves, leave the crown — it will regrow.

    Peppers

    Sweet and hot peppers thrive in 3- to 5-gallon pots in full sun. They love heat reflected off concrete patios.

    Herbs

    • Basil, parsley, chives, mint (in its own pot — it spreads), thyme, oregano.
    • Most herbs need 6 hours of sun and weekly water.
    • Pinch flowers to keep leaves tender.

    Other reliable container crops

    • Cherry tomatoes (5-gallon pot, staked)
    • Bush beans (6-inch deep window box)
    • Radishes (4 inches deep, ready in 30 days)
    • Strawberries (hanging baskets are surprisingly productive)

    Container care

    • Use real potting mix, not garden soil — it compacts and chokes roots.
    • Pots dry out faster than beds; check daily in summer.
    • Feed every 2 weeks with diluted liquid fertilizer.
    • Choose pots with drainage holes; saucers are optional.

    Practical tips

    • Group containers to create a microclimate and reduce drying.
    • Self-watering pots are worth the cost for tomatoes and peppers.
    • Reuse potting mix by refreshing with one-third fresh compost each spring.

    FAQ

    How big should pots be? Lettuce and herbs are fine in 1–2 gallon pots. Tomatoes and peppers want 3–5 gallons. Bigger always works better than smaller.

    Why are my container plants yellowing? Often nutrient washout from frequent watering. Feed lightly but more often.

    Conclusion

    Containers turn even the smallest space into a kitchen garden. Start with two or three of these crops, get the watering rhythm right, and you’ll be eating your own harvests within a month. For schedule help, see our guide on the vegetable garden watering schedule.

  • How to Grow Tomatoes in Raised Beds for Bigger Harvests

    Tomatoes love raised beds. Better drainage, warmer soil in spring, and easier to mulch and stake — most home gardeners see their best harvests once they upgrade. Here is how to set yours up for a season of fat, flavorful fruit.

    Best bed location

    • Pick the sunniest spot you have — 8 hours minimum.
    • Avoid windy corners; tomato vines snap on heavy stakes in a gale.
    • Closer to the kitchen means more frequent harvests. Convenience wins.

    Soil mix

    Tomatoes are heavy feeders. A good mix is roughly equal parts topsoil, compost, and coarse organic matter (aged bark, leaf mold, or coco coir).

    • Mix in a handful of bone meal per plant for steady phosphorus.
    • Add a tablespoon of crushed eggshell at planting for slow calcium.
    • Refresh the top 4 inches with fresh compost every spring.

    Spacing

    Determinate tomatoes

    These bush types stay compact and ripen most fruit at once. Space them 18–24 inches apart and use a small cage.

    Indeterminate tomatoes

    Vining types grow all season. Space 30–36 inches apart and use a tall stake or string trellis. Prune to one or two main leaders for best airflow.

    Watering

    • Deep, even watering prevents blossom end rot and cracking.
    • Mulch with straw to keep soil temperature steady.
    • Water at the base, never on leaves, to prevent disease.

    Practical tips

    • Pinch off the lowest 2–3 sets of leaves to prevent soil splash.
    • Side-dress with compost when the first fruit appears.
    • Pinch suckers on indeterminates weekly for cleaner growth.
    • Plant basil at the corners — flavor pairing and likely fewer pests.

    FAQ

    How deep should the bed be? At least 12 inches. 18 inches is even better for big varieties.

    Why are my tomatoes splitting? Inconsistent watering. Mulch and a steady weekly soak fix it fast.

    Conclusion

    Raised beds give tomatoes the warmth, drainage, and structure they crave. Build the bed once, refresh the soil annually, and prune for airflow — your harvest will reward you. New to raised beds? See how to build a simple raised garden bed.

  • Beginner Vegetable Garden Guide: Plan, Plant, Grow, and Harvest

    If you can grow tomatoes and lettuce in your first season, you can grow nearly anything. The trick is starting with a small, sunny bed and a short list of beginner-friendly crops. This guide walks you through the whole journey: choosing a spot, building soil, planning crops, watering, and harvesting.

    Choose the right location

    • Most vegetables need 6–8 hours of direct sun daily.
    • Pick a level, well-drained spot near a hose connection.
    • Start small: 4×8 feet is plenty for a first bed.

    Build healthy soil

    Compost

    Add 2–3 inches of compost on top of your bed before planting. It feeds plants slowly and improves both sandy and clay soil.

    Soil testing

    • A simple home test kit reveals pH and basic nutrients.
    • Most vegetables prefer pH 6.0–7.0.
    • If pH is too low, add lime; too high, add sulfur or peat.

    Plan your crops

    Cool season

    Plant in early spring or fall: lettuce, spinach, kale, peas, radishes, carrots.

    Warm season

    Plant after your last frost: tomatoes, peppers, beans, cucumbers, squash, basil.

    • Group plants with similar water needs together.
    • Leave room — overcrowded plants get sick easily.
    • Stagger lettuce plantings every 2 weeks for continuous harvest.

    Watering and mulching

    • Aim for about 1 inch of water per week, including rain.
    • Water deeply once or twice a week, not lightly every day.
    • Mulch with straw or shredded leaves to keep soil moist and weeds down.

    Harvesting

    • Pick often — frequent harvest tells plants to keep producing.
    • Harvest early in the morning when veggies are crispest.
    • Use scissors or pruners to avoid tearing stems.

    Practical tips

    • Keep a simple journal: what you planted, when, and how it did.
    • Walk through your garden daily — you’ll catch problems before they spread.
    • Don’t try to grow 20 crops year one. Master 5 first.

    FAQ

    Should I grow from seed or buy starts? Both. Buy tomato and pepper starts; sow lettuce, beans, radishes, and carrots directly.

    Why are my plants leggy? Not enough sun, or seedlings started too early indoors without strong light.

    Conclusion

    A productive vegetable garden is mostly about consistency: water deeply, mulch well, and harvest often. Use this as your roadmap, and check our guides on tomatoes in raised beds and building a raised bed when you are ready to scale up.